Thursday 29 December 2011

Magical Mandalas


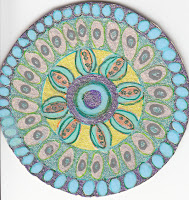
I am doing an www.atcsforall.com swap on Mandalas - this has come at a perfect time as I have been reading about Carl Jung and his interest in and creation of mandalas:-


 The mandala is an archetypal image whose occurrence is attested throughout the ages. It signifies the wholeness of the Self. This circular image represents the wholeness of the psychic ground or, to put it in mythic terms, the divinity incarnate in man.”

Memories, Dreams and Reflections
Pages 334-335


(Apparently Jung did a mandala a day for years - which is a fascinating idea - mmmm....!!) 

The challenge is very interesting because the circle has to fit on an ATC sized card  which is 3.5" x 2.5" (- though it does not actually have to be a circle, and there can be decoration around the circle if you do use one so it is very flexible!)

 It is to be a mixture of hand drawn/coloured and mixed media.

The first 3 I have done involved a compass for the circles and then I
 intersected the central point -  it is incredibly relaxing and was a nice break in the middle of all the Christmas preparations. I supposed like semi-conscious doodling.


The next three came from this link from atcsforall.com:-
http://www.mandala-4u.com/en/start.html

where there are lots of  free downloadable templates (for non-commercial use)
I scaled them down and printed them out and did my "colouring in"

 This is also great and it is truly incredible how the same template can produce totally different effects...


The ones I have used so far are all by Dala Freeman

And last but not least and also with heartfelt thanks to www.atcsforall.com there is a fabulous free class with a truly inspired tutor,  Guadalupe Brizuela Cabal,  here:-
  http://willowing.ning.com/group/the-mandala-free-class 

Thursday 15 December 2011

Continuing 30 Days in Your Journal

 Christmas arghh! I found myself in a red mist waiting for the tea pot to fill in Morrison's cafe yesterday so I think I am needing a bit of zen-like calm now!

However the journalling journey continues so Julie's course has been such a complete inspiration!

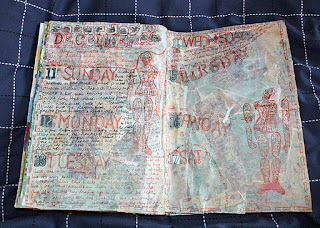
For the first pages I used my fonts and numbers and stamped a load of autumnal leaves as the last leaves were finally falling from the trees -  although not until December!


The next pages use stencilled letters and my black and white numbers - which are a bit drab I think.

I also have a lovely rubber stamp set that prints a paper doll, so I used that with a Faber Castell sanguine artist pen - my new favourite! - for writing December inside the stamp.

I think it makes for some interesting focal points!


I have prepped some pages ready for Christmas week - I have used Christmas Emporium papers by graphic 45 and cArt-Us Christmas Collection 2. They both have a lovely vintagey Christmas feel to them.


I shall have to pull out the stops for Christmas Eve, Christmas Day and Boxing Day pages!!

A decorated font - structured italic


I am still having great fun playing with decorated letters and numbers!
This one is an actual font, called structured italic, which I drew on a grid in pencil, inked in a black Faber Castell artist pen then erased all the pencil marks.
I found the font in a calligraphy book and I think it looks really curvaceous!
For the colour I used Sakura pens, acrylic paint, Marvy Uchida liquid applique, and Faber Castell pens in black, sepia and sanguine.
I shall scan it in and use it in various sizes in my journalling- watch this space! I think it will be interesting to see the effect of using an actual font instead of the random letters I used before... I will see which I like best!

Wednesday 7 December 2011

Alphabets and phrases - inspiration from 30 Days In Your Journal - continued


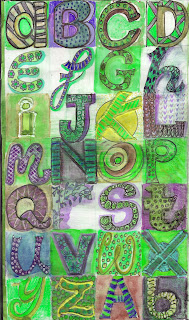
The alphabet was drawn on a grid and, after decorating it with everything I have, was scanned.


I realised that I can now play around with the scanned alphabet.


First I used Enhance, Adjust Colour,  Adjust Hue/Saturation in Photoshop to give me a green hued font and a blue hued font.


This gave me two new alphabets as well as the really colourful one that I made first.


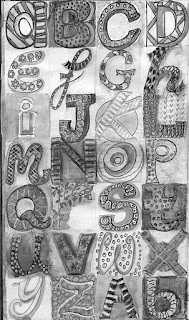
For the monochrome version I used Convert to Black and White then selected Vivid Landscapes to get it as contrasty as possible. 


The spread, right, uses the original coloured font to prepare pages for journalling - I really like the effect and it makes it very personal....


Then finally I have made another grid and this time used it for days of the week, months of the year and the seasons, so I have ready made phrases which I can also scan and modify on the computer, and print out and collage into my journal...

Monday 5 December 2011

Alphabets and Numerals - inspiration from 30 Days In Your Journal


HAPPY DECEMBER!

I have loved drawing and colouring my own alphabet for the 30 Days in Your Journal  course - loved it so much that I have done a set of numerals as well. Then I scanned them in, printed them on an ink jet printer and cut and pasted them into my journal... I used a mixture of watercolours, Creative Imaginations Luminarte Twinkling H20 s, Sakura souffle and gelly roll pens, Derwent Inktense pencils, watercolour crayons, and assorted pens plus Marvy Uchida Liquid Applique - so it has also been a workshop on using all the stuff I have got stashed away!


I printed multiple sheets at various sizes and think they are a nice way to personalize my pages - I edited the first title page I did and I really prefer it. So  I have got the bug now so another alphabet - or two! - is calling me!!

Monday 28 November 2011

30 days in your journal - more continuing the journey!

I am loving Julie Fei-Fan Balzer's 30 Days In Your Journal course and can highly recommend it as I have learned so much!
I shall be so sad when it is over!


I am loving this idea from the course, to draw and colour your own alphabet using your own style of handwriting. I have used watercolours, plus watercolour crayons, Derwent Inktense pencils, black and white pens and Sakura gel and souffle pens, plus some wonderful Liquid Applique - for which I am indebted to Vicki Z on ATCsforall.com who sent me some as I could not get it in the UK. It's great stuff and puffs right up when it is heated.

I am thinking I can use this scan and print it out in different sizes to use as a really interesting font to cut and paste - and I can do the same with numbers! Wow, looking forward to seeing some of these letters as words!

This second spread is taking the leftovers and scraps approach of Julie's - I have the card and paper that's left after using Cuttlebug dies, and it makes great stencils and collage elements. I like the white gesso over the top to unify the page.

I also love the Letraset list for today - even though I should be doing what is on it instead of blogging about it!:)

Sunday 27 November 2011

And Yet More 30 Days In Your Journal


I am still doing this wonderful on-line course by Julie Fei-Fan Balzer. It is really good for showing new techniques that I have never tried before and also it has freed me up to do much more of the journalling - instead of just the art!

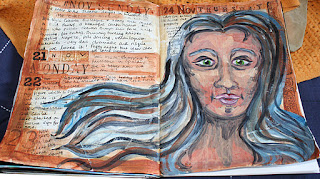
This was an interesting spread to do, as it uses a collage of old book pages, plus gesso and watercolour as the background and has a focal point of a face and hair.

I like the idea of the face becoming an integrated part of the page, with journalling flowing around it.
My first woman had wonky eyes so I had to repaint her. My husband says all my women are dreamy pre- Raphaelite types with full mouths, large eyes and languid expressions ( he thinks they are very soppy!). Therefore this face is a much stronger and more powerful one... I did not like her much at first, but she is growing on me! I think she would be someone to turn to for good advice!


The next page was great fun; this part of the course involves playing with alphabet letters, and trying to use your own style to make a personalized font.
I shall be interested to see how this page develops (watch this space!)


I made a grid for the alphabet and used the left over right hand side of the page to add to the left hand page to make a slightly wider spread for journalling; I used Julie's lovelyThanksgiving image as although we don't celebrate it here in the UK, my son is in Michigan with his US wife and they were celebrating with a chicken stir-fry:)

(Some of the journalling is a rant I'm afraid as my husband's hospital referral - which was supposed to have been done a month ago was never made:()

However - for the headings I used some Dover and Sizzix alphabets, some peel offs and the numbers were Tim Holtz chipboard letters, Sizzix again and some Cuttlebug numbers - plus my nice new spotty washi tape as thanks to Julie I have found this new arty resource!

Sunday 20 November 2011

30 days in your journal - continuing the journey!

Because I am in the UK so I could not get the recommended  journal but I already had a a really nice cheap little book from specialist crafts art design
www.specialistcrafts.co.uk/products-Economy-Sketchbooks_D...
It is A4 cartridge paper and gives me 19 double spreads and was only £1.94!!
"Economy Sketchbooks
A range of low cost sketchbooks that contain good quality 160gsm white cartridge. Ideal for most sketching and illustration exercises. An excellent low cost bulk usage product. Staple fixed - 20 sheets per book."
It has stood up really well to painting, layering, collaging and stamping.

I decided to go back to the beginning and add a title page, using water colour washes, paints, stencils and collage, so it leads in to the book now.

The background of this double page spread uses  Cuttlebug plus Sizzix Ink-its Letterpress Plates which "combine style and ease to create artful ink-debossed impressions. This easy process impresses paper, cardstock, chipboard, mat board and other soft, thick materials. Elegant enough for any occasion, they provide the perfect accents for cards, invites, scrapbook pages..."
I used archival Whispers stamp pads and collaged the 
prints on.


Then I used the Tim Holtz Sizzix bird cage and bird dies, blue Cuttlebug butterflies and numbers. 

Most of these were cut from an old French paperback of "The Witches of Eastwick" as I love foreign text, and I am just going through the book adding watercolour washes to every page ready for use.
Now back to the course!! This spread uses a black background instead of white


 Something I have never done.


I should have used black gesso and watercolour crayons but did not have the gesso and did not want to wait for it! :( so I used black airbrush paint instead - it covered well and has a matte finish, BUT the surface would not take water colour crayons. So I used watercolour paints instead to draw and colour the butterflies, then I decorated and journalled with a white uni-ball signo broad pen. This covers everything, so long as I remember to let it dry first!
My husband LOVES this spread!!

Monday 14 November 2011

Chine collee on dry point acetate sheets using the Cuttlebug as a press


More 30 days In My Journal

On this spread I used a Tim Holtz slide die cut.
I have been experimenting with using a Cuttlebug as a printing press with dry point on acetate sheets; I pushed archival stamp ink into the cuts I had drawn in to the sheet to make a face. I printed on damp paper so you can see the different attempts.
It also worked for chine collee - I inked up the plates and then laid collage elements face down on top, glued the back surfaces (facing up) and laid damp paper on top - which means the collage sticks to the paper and the dry point prints through making a kind of sandwich .. v pleased with this experiment:) 
I alos used the Cuttlebug to make lino cuts from a fish cut I did - again using Whispers archival ink pads, also worked - yay!!

Friday 11 November 2011

More 30 days in your journal

I am really enjoying this course. This page uses tags and ephemera for journalling.
Following the course I did stencilled rectangles on a watercolour background.
On the left hand side of the spread I have used  lots of bits and pieces that have been sitting around. I used a parcel tag sandwiched with a piece of Cuttlebug remnant paper with tag dies cut out, copies of 3 old autumn atcs I did ages ago and fragments of poetry.
On the right hand spread I have used print outs of pieces I made using the Serif Craft Artist software and elements from their Daisy Trail Digikits. You can change colours, sizes and orientation and there are alphabets and numbers. I also used some autumn images and some digital tags.
I printed two copies of the digital piece with the clock, distressed the back and stuck one on top of the other, so the top section lifts up and I have journalled underneath in white pen. (So that part is both  interactive and personal)

Wednesday 9 November 2011

30 days in your journal

This is a great course I am doing with Balzer Designs; it has really got me doing the actual journalling in art journalling instead of just the art!!


This is about going to see a broadcast of Tosca from the Royal Opera House at a cinema in Lincoln on Nov 7th...


While this is the beginning of journalling about several days in November - with material about autumn, night and day etc.

Tuesday 8 November 2011

More altered books - reborn books


Lisa Vollrath's Reborn Books Class


If you are ever looking for the best ever course on reborn books take this!!!!
 Lisa Vollrath's Reborn Books Class -If it runs again sign up!!


See Lisa's brilliant work here...
http://www.lisavollrath.com


It is one of the best courses I have ever taken and I have learned how to take an old book and use the cover to bind my own pages.


This was an old encyclopaedia and the pages are back to back distressed inkjet prints (of pages from medieval books of hours that I have been collecting for ages)


I am going to use it as a kind of calendar of the year - spring, summer, autumn, winter -  and maybe doing some material about universal festivals like Yule/Christmas, Festivals of Light and so forth.


I have been planning to do a book of hours for ages and this course has created it for me!!


(See also http://www.tentwostudios.com/ and the Monthly Muse and Go Make Something)

Wednesday 2 November 2011

Thursday 6 October 2011

And now some happier pages


I love this colour scheme - red, black and neutrals - and I also have asked for it in my new deco book which is about to go into a deco journal swap on atcsforall.com.

Again I was planning to use some Cuttlebug bits and pieces - Tim Holtz dies again, the steampunk cogs and wheels and slide die, and used them to cut out stark black, red and lettering.

I also used lettering from the Melody Ross SoulFood, pages again, plus old book pages, and positive and negative cuts for the butterflies,

Finally I used a script Cuttelbug embossing folder to make a back ground of embossed semi distressed script and used some frames made from Paper Cellar Ltd Victorian Classic papers waste after I had cut out some journal pages.. I wanted a strong composition of squares with repetition of elements..

I was  terrrifed of my work becoming twee by using embossing folder and cutting dies, but I am really pleased with the drama of this page...

And also using more stepped pages...


As I said in the previous post ,back in April I was writing about using the Strathmore Journal workshops to make stepped pages and fold out pages, so I have had some pages with the backgrounds waiting to be used since posts in April and June... as another part of my Art Journal Every Day challenge.. 


so this time I have been using the set of stepped pages.

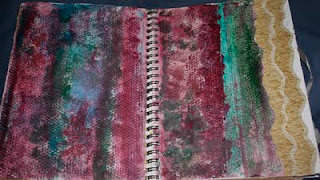
Back in June I made these backgrounds and borders for the stepped pages I made for Strathmore Art Journal papers Workshop 2.


I have re-posted the pictures here which show how I added the borders and used  acrylic washes and sequin waste to make  a series of backgrounds.


But then I was not sure what to do with them, so they languished ...


Then I was thinking about memories and how to exorcise - or learn to live -  with difficult past events.

And also thinking that I want to try to combine poems I have written in the past with my current art journalling.

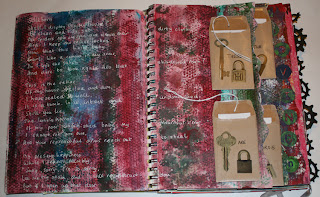
The result is some dark, confessional pages...

Our first baby was stillborn and a year later we had a beautiful daughter, but then 3 years later we  had another daughter, but she was also stillborn at 38 weeks.

Then 6 years later we had our first son and 22 months later a second son - and it was at that stage that I was able to write about what had happened, so these pages are the poem that came out of a kind of acceptance of what had happened, because what else can you do?

I had my miracle family - we had our three beautiful children - but there were still little ghosts in the shadows of the babies that might have been...

But I had shut it all away so the poem is all about that sealing of experiences - and unsealing them.


Then the final spread is about Openings and Moving On, with some journalling about where I am today... now that the children are all grown up and now that we have grandchildren..


More Using Fold Out Journals -


I always said it was a hyperactive blog - but it is not fast!


Back in April I was writing about using the Strathmore Journal workshops to make stepped pages and fold out pages, so I have had some pages with the backgrounds waiting to be used since posts in April and June... as another part of my Art Journal Every Day challenge...

I had got as far as using some eraser stamps I carved to stamp "seek", "find" and "live" all around the edges of the page, but then I was playing with my new Cuttlebug.

I have got some Tim Holtz dies and big up plates for the Cutttlebug, so I have used his slide film die plus other Cuttlebug and Sizzix dies for lettering, butterflies and dragonflies.

I got some lovely paper by Melody Ross designer collections called "Soul Food" with these great generic fifties/sixties women, so I cut those out and used the same paper as some of the die cut material.

There was a quote on the page with the girl on the left saying "She stopped to smell the daisies" so I used that as the theme of the page. I used two other figures - one on the left looking serious and studious with one in the middle encouraging her to have a full life and also take some time out.

Then I had a rush of flowers and insects going across the whole panorama and to link the women and to give it a joyful feel...


I feel happy just looking at it!!

Monday 26 September 2011

Making Art Dolls


I signed  myself up for lots of swaps on ATCsforall.com for making art dolls - jointed paper dolls on a theme  - so as a result I have been making lots of dolls.

Great fun, the room is full of funny little people!


Rather than use a template -(thought there are lots of them on the site and on the internet ) - I decided to draw my characters and then turn them into the jointed dolls.

So I did lots of drawings.

I had 4 themes - mermaids, spooky halloween dolls, failed super heroes and women..


I photocopied the sketches I had made and stuck them on a light box with masking tape. I drew over the images, allowing for the overlapping in the sketches - i.e. I added extra pieces to fit behind other pieces, like long necks to heads so the heads could be fastened behind the bodies, extra long shoulders to the tops of arms etc so the finished drawings were all the bits of the dolls ready to be assembled with paper fasteners with all the hidden bits also shown. Hope this makes sense!

Then I transferred the images onto white paper and stuck the whole sheets to card with PVA glue.

I added some finer details - like the hands - and then coloured them in using Inktense pencils. These are very controllable but look like paint when wetted - you can also add more detail over them without the first coat running. I also used some twinkling H20s for the mermaids' tails and metallic pencils for robotic shine...

Then I laid each join together, pierced them with a - mmm don't know what it is called it is basically a pointed spike in a metal handle - and then used paper fasteners to animate them... I shall be quite sorry to see them go!