Wednesday 30 March 2011

Strathmore Workshop 2 - Start Where You Are. Instructor Linda Blinn

The second free workshop of the great series from Strathmore* was more about ideas and techniques than in making a single journal page like Workshop 1; there were lots of useful  ideas but I particularly liked these:-


1. Making pockets to keep bits and pieces while the journal is evolving is a useful tip:-
"Cut a diagonal line from the top left corner to the right edge of the page—approximately 6 inches up from the bottom right corner (for 9" x 12" size journal).Use double sided adhesive tape or glue to secure the bottom of the pocket. Use brads or tape on the right edge to hold the pages together."
I put this inside the back of the journal.


I  have been using acrylic washes up until now for journalling,  but the instructor likes water soluble crayons, paints and pencils so I have had a change.

She suggests making grids by rubbing over things -  these were plastic pockets for storing slides etc
and I used water soluble pencils.

For these I used various stencils and used a mixture of water soluble crayons and mister bottles.

The pages are now ready for journalling on...


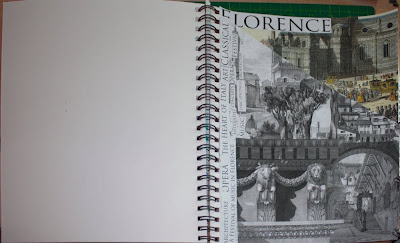
 Another really good idea which - doh - had never occurred to me is to add an extra piece to a journal to give a bigger interactive spread


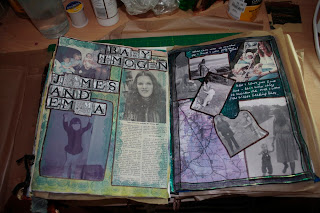
I am doing a kind of family history journal and  I had left stuff out....


so I added another fold out page on the left


Of course if you have foresight you could add extra pages to the journal for a panoramic spread as you go - see right

To add the extra page, just score a fold and glue it to the edge of the page and the page is ready to use. I had to disguise the overlap where I added the extra to the journal I was already working on....

*The workshops are completely free and are still open and you can work at your own pace - the next one starts on May 1st and you can still join the first two workshops. See http://www.strathmoreartiststudio.com

" Once a workshop begins, you can join in at any time and complete workshops at your own pace. Once a workshop begins, it will stay active until August 1, 2011."

Tuesday 29 March 2011

How to make a complete altered Book


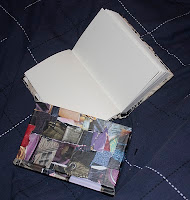
I got the book in a charity shop; it was one of a run of printed classics so it was not valuable so it was OK to cut it up


Because the book has a  distressed look I decided to keep an aged feel to the contents -  


I removed some of the signatures and glued the remaining pages together in twos.


After that I covered the pages with white gesso, I had to have two goes with the gesso, the first lot stayed tacky but it was very old and had been very cheap.


So I bought a new branded pot Daler Rowney System 3 acrylic gesso primer and that worked


I used a photo copy of the first
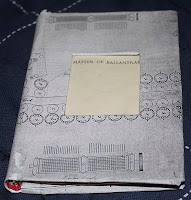
Babbage computer and added a doll's fabric face as I wanted to try
cutting an insert in the cover


I added a title with some photocopied clip art alphabets

"A Little Book of Here Now -  Past and Present"

It sank into the background so I did thin gesso washes over the cover and darkened the face; one of  the eyes did not take the colour but I decided to keep it - even though my husband hated it in either version and thought it was horrible and creepy.


The first spread has image transfers - using clear tape over  photocopies; when dampened you can peel off the white background paper and add the black and white image to the page on its now transparent background using acrylic matt gel medium -

The sepia toned piece on the right hand side is an atc trading card with a peeling paint background and image transfers, with collaged letters.


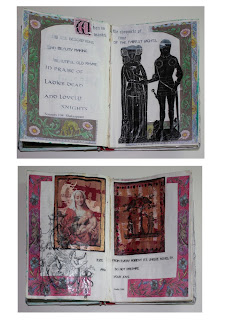
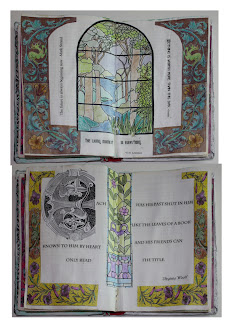
The top double page spread has image transferred text and images with collaged lettering. The border is a black and white medieval border,  coloured, scanned and reduced to size. 


The second spread  uses the same methods with the page tinted with an acrylic wash and the lettering image transferred over a "gold" acrylic paint background. The borders are black and white borders cut out and tinted green.


The first double spread has the tinted borders again and image transfers. I coloured a large capital to start the text to keep the Medieval feel


The next spread has ATC cards again with peeling paint background under collage and image transfers.

The "Illuminated Capital" is an image transfer to introduce the image trnasferred text. I found the quotations about past and present on the internet and used those


The other pages were done in the same way, playing with collage elements, borders and illuminated capitals


I added colour to some elements with coloured pencils


Using coloured pencils on the photocopuies and then image transferring the images gave a subtle tint to the  images


The sea creature is a tinted image transfer and so is  the tree of knowledge below, while the stained glass is coloured pencil over the photocopies with the images transferred on with the background intact.


On the right originals of some of the dover images on clip art pages are illustrated, including an example of one of the page borders before colouring


Saturday 5 March 2011

ALTERED BOOKS


Well I am not art journalling every day as I hoped
 - unrealistically of course! :( 
- but I am doing a lot of work on journals 
so Art Journal Every Day  has definitely been an inspiration


ALTERED BOOKS

I have just done a swap on www.atcsforall.com on altered journal covers so this has finally got me into the world of altered books, something I have been planning for ages.

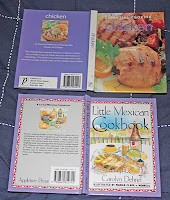
For this swap the books could be no more than 6” x 6” maximum (approx 15 x 15 cms) so I went to local charity shops and found a couple of tiny hardback recipe books and some old hardback novels.  No valuable first editions!


Books to alter have to have stiff covers and  must have stitched sections in the spine - not glued, as this technique won’t work with glued spines. If you look down the spine you can check to see that the pages are stitched in sections known as "signatures", and if you open up a signature in the middle the stitching threads can be seen.

Because the pages will be coated with gesso and then collaged or otherwise written and painted on, about half the signatures need to be removed to accommodate the new thicker pages.

The remaining pages  are glued together in twos ( in a novel with very thin pages you need to glue maybe 6 together at a time). I use a mixture of PVA glue, acrylic gel medium and a bit of water to dilute it if it is too thick. I got the recipe from Art Trader magazine's fabulous course on Art Journals - Creative Exploration and this seems to stick anything to anything, seals down collage without too many bumps and can also be tinted with acrylic paint.

The pages  are then coated with several thin coats of gesso to create a good working surface.  I used greaseproof paper under the backs of the pages I was gessoing to keep the gesso under control and I left it there while the pages dried. The first gesso I used remained tacky and people on the swap site said they would never dry properly so I stuck those pages together and I bought new and more expensive gesso which did dry without stickiness. I think the important thing is to use several thin layers and to let them dry completely between coats - however impatient this makes you (it certainly made me!). I was also advised to try talcum powder (which I didn't - so am not sure how that would work but it would probably be good)  and/or to use greaseproof paper between the leaves after they dried - which I did do just for peace of mind as the pages do seem to be completely dry and not tacky at all.
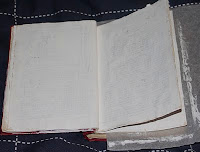


The covers are then ready to be decorated to taste before you start journaling. In the recipe books the pages were quite thick so that they could be written on directly but the novel pages are thin and quite bumpy because of the way they dried, so I will have to collage over those.


The recipe books became the House Book and the Flying Duck Book.
 I used a mixture of collage and embellishments with ribbons and keys.


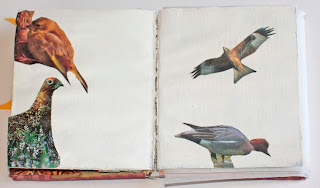
The flying ducks were on an old birthday card and I found bird images to stick inside (on the thick page that resulted from gluing the old non drying gesso pages down!) and I collaged the inside covers back and front.

For the house book used a little house I had drawn and stuck it on the cover and I added a cat inside the opening door and some old keys on black ribbon


Another little book has an insert cut into the cover for a doll's face and was covered in a print of the original Babbage computer. The original was a bit wonky! So I cheated and collaged extra elements on to straighten it all up.


Ready made books can also have their covers personalised 
 in  preparation for art journaling. 
I found some little sketch books and autograph books to decorate. 

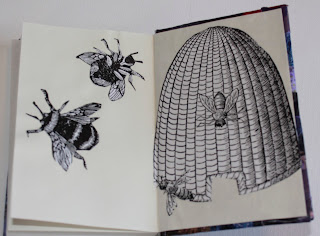
One little sketch book became "Bee is For Book". I collaged the covers and gave them a purple wash of thin acrylic paint, then added some bee images and cut out fonts from Dover clip art books. I added bee images inside the front and back covers and a random bee inside the sketch book for a surprise.
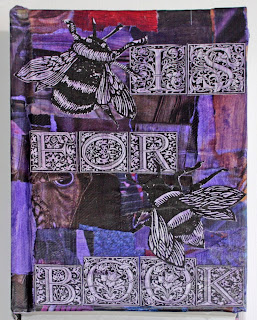
 
                                               
this is the collaged book before the acrylic wash was added 


I covered the other with lace and added old lace bobbins


And a little autograph book became this Phrenology notebook; I used a torn paper background and image transfers of heads and hands (as described in the Shadow Box Workshop notes)


Some of these have been swapped out but I hope to post on what goes inside the ones I still have!

© 2011 Shirley Bell redplantlady